Okay, let me tell you about my first real run-in with these MOSFET things. It wasn’t in some fancy lab, just me fiddling around in my workshop trying to get something working.
My Little Lighting Project Fiasco
So, I had this idea. I wanted to hook up some really bright LED strips under my workbench. Not just turn them on and off with a switch, no, I wanted to control the brightness with a little knob, you know, using a microcontroller, an Arduino actually. Seemed simple enough, right? Famous last words.
I grabbed a regular transistor first, one of those little BC547 types I had lying around. I remembered using them back in the day to switch small things. So I wired it up to the Arduino pin, connected the LED strip through it to the power supply. Turned it on. Poof! Okay, not quite poof, but the little guy got hot super fast, and the LEDs were barely glowing. Clearly, that little fella couldn’t handle the juice these LED strips were pulling. It just wasn’t built for that kind of power.
Back to the drawing board. I thought, okay, maybe I need something beefier. I tried a bigger transistor, a TIP120 Darlington. That worked a bit better, the LEDs were brighter, but man, that thing still got really warm, especially when I tried to dim the lights using PWM (that fast on-off switching trick). It needed a heatsink, and honestly, it felt clunky. Plus, it was drawing a fair bit of current from the Arduino pin itself just to turn on, which wasn’t ideal.
Discovering the MOSFET
I was getting frustrated. I complained to a buddy of mine who’s more into electronics. He just casually said, “Why aren’t you using a MOSFET?” A what now? I’d heard the term, seen it on circuit boards, but never actually messed with one intentionally.
He explained it simply: “Think of it like a switch, but controlled by voltage, not current. And the good ones can handle tons of power without breaking a sweat or needing much ‘signal’ power to turn on.”
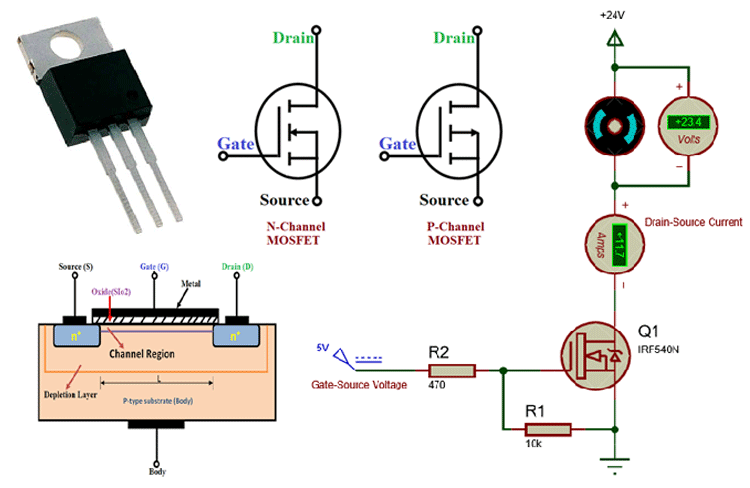
So, I ordered a few logic-level MOSFETs – I think they were IRLZ44N or something similar. The “logic-level” part was important, meaning they could be fully turned on by the low voltage signal directly from my Arduino, unlike some other MOSFETs that need a higher voltage.
When they arrived, they looked a bit like the bigger transistor, usually three legs: Gate, Drain, Source.
- The Gate is like the control knob. Put a little voltage here (from the Arduino pin).
- The Drain is usually where you connect the thing you want to power (like my LED strip’s negative lead).
- The Source typically goes to ground.
I swapped out the Darlington transistor for this MOSFET. Wired the Arduino PWM pin to the Gate, the LED strip’s negative lead to the Drain, and the Source to the ground. Powered it up.
Night and day difference! The LEDs were super bright at full power. When I dimmed them using the PWM signal, the MOSFET barely got warm. Seriously, I could touch it, and it was cool. And it was switching super fast, no problem. The dimming was smooth. It just worked, handling the power like it was nothing.
So, What’s It Used For? My Takeaway
That whole experience really showed me what these things are good for. For me, the big use is switching stuff. Especially stuff that needs more power than a little microcontroller pin can handle directly.
- Like my bright LED strips.
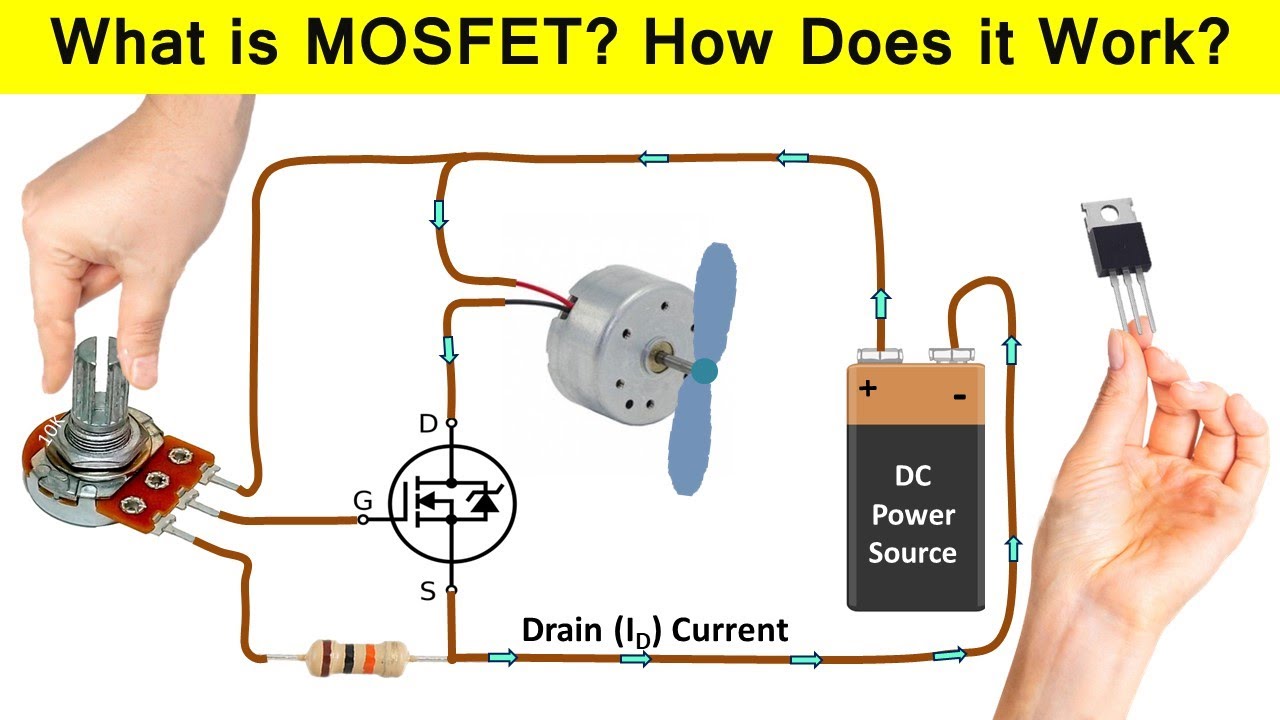
- Or controlling motors – turning them on/off or controlling their speed.
- Powering heaters or fans.
- Basically, acting as a digitally controlled electronic switch for higher current or voltage loads.
They are super efficient, meaning they don’t waste much power as heat, unlike those older transistors I tried first. And because they are controlled by voltage, they don’t put much load on the thing controlling them, like my Arduino. Since then, I’ve seen them everywhere – in computer power supplies, audio amplifiers, battery management systems. They’re kind of the workhorses for efficiently controlling electrical power in modern electronics. It all started with trying to get some workbench lights working properly!