Alright, so I figured I’d share a bit about my recent tinkering session, specifically with an n-channel mosfet smd. You see these tiny little black squares on every circuit board nowadays and think, “Neat, compact.” But let me tell you, getting one of these to behave when you’re just a hobbyist messing around in your workshop, that’s a different story.

My Little Project Needing a Switch
So, I was working on this small LED dimmer project. Nothing fancy, just wanted to control the brightness of a strip of LEDs. I’d read that an n-channel MOSFET would be a good fit for switching the low side of the circuit. And because I wanted to keep things small, an SMD (Surface Mount Device) version was the obvious, or so I thought, choice. My thinking was, “How hard can it be?” Famous last words, right?
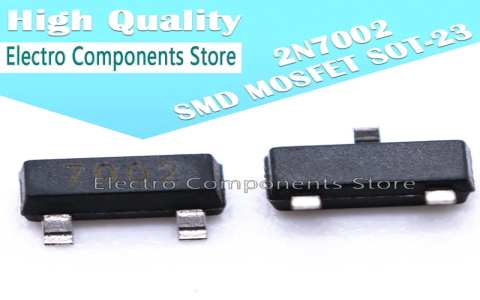
First off, getting the actual MOSFET. I ordered a strip of them, I think they were SOT-23 package, or something equally minuscule. When they arrived, I swear I almost lost them just by breathing too hard. These things are tiny. My regular through-hole components look like giants next to them.
The “Fun” Part: Soldering
Now, the real “adventure” began when I tried to solder this little beast. I don’t have one of those fancy reflow ovens. Just my trusty soldering iron, a relatively fine tip, and a bottle of flux.
My plan was to solder it onto one of those little SMD to DIP adapter boards, so I could then plug it into my breadboard for testing.
Here’s how it went:

- Attempt 1: Dab of solder paste (probably too much), placed the MOSFET with tweezers that felt like chopsticks trying to pick up a grain of sand. Hit it with the iron. Result? A messy blob. The MOSFET was probably skewed, and I was pretty sure I’d bridged at least two pins. Yep, checked with the multimeter, total short.
- Attempt 2: Cleaned up the mess with some solder wick. This time, I tried to tin the pads on the adapter board first, then place the MOSFET, add a tiny bit of flux, and gently heat each leg. A bit better, but one leg just didn’t want to take. It looked like a cold joint.
- Attempt 3 (The Charm?): More cleaning. This time, I really focused on getting just the right amount of solder on the iron tip, used plenty of flux, and tacked down one pin. Then, carefully, the other two. I held my breath. It looked… okay? Not beautiful, but the pins seemed distinct.
Testing, Testing, 1-2-3
So, with the MOSFET (hopefully) soldered to the adapter, I nervously plugged it into my breadboard. I set up a simple circuit: a power supply, an LED with a current-limiting resistor, and I planned to use the MOSFET to switch the LED on and off using a signal from my microcontroller.
I connected the gate to a digital pin, drain to the LED’s negative side, and source to ground.
I uploaded a basic blink sketch to the microcontroller. And… nothing. The LED stayed off.
My heart sank a bit. Did I fry the MOSFET with too much heat? Was it a bad solder joint after all? I double-checked my wiring. Everything seemed okay. I poked around with the multimeter. Voltage at the gate was switching as expected. But no current through the LED.
Then I remembered something about gate threshold voltage. Maybe my 3.3V signal from the microcontroller wasn’t enough to fully turn on this particular MOSFET? I rummaged through the datasheet I’d forgotten to check thoroughly. Ah, there it was. This one needed a bit more. Luckily, I had a logic level shifter handy, or I could have just used a 5V output. Switched the gate signal to 5V.
Success! (Sort Of)
And then, magic! The LED blinked. On. Off. On. Off. It worked! The relief was immense. That tiny little piece of silicon was finally doing its job. I could now control a decent amount of current for my LED strip with a tiny signal.
It’s funny, you know. You spend all this time fighting with this microscopic component, cursing under your breath, and then when it finally works, it’s such a small victory, but it feels huge. It’s not just about the n-channel MOSFET SMD itself, but the process of making it work. It really makes you appreciate the engineering that goes into these things and the skills (even my clumsy ones) needed to work with them by hand.
So yeah, that was my little saga. Next time, I might just try a slightly larger package, or maybe finally invest in some better soldering gear for these SMDs. But for now, this one is blinking away, and I learned a thing or two, mostly about my own patience.