Today, I wanted to mess around with MOSFETs and see if I could get one to work in saturation mode. I’ve heard that’s where they act like a closed switch, so I figured it would be cool to try it out.
Getting Started
First, I grabbed a few things from my parts bin:
- An N-channel MOSFET (I think it was an IRF540, but honestly, any similar one should work)
- A resistor (around 220 ohms, to limit current)
- An LED (just to see if it’s working)
- Some jumper wires
- A 9V battery
- A breadboard (to make things easier)
Setting it Up
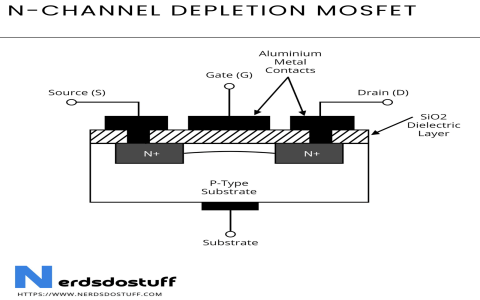
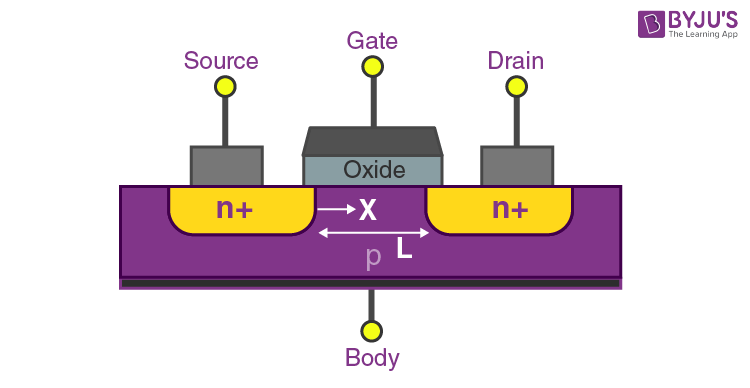
I started by placing the MOSFET on the breadboard. I made sure I knew which pin was the Gate, Drain, and Source. There should be data online.
Next, I connected the positive side of the battery to one end of the resistor. Then, I connected the other end of the resistor to the Drain pin of the MOSFET.
I took the LED and connected its longer leg (the positive side) to the Source pin of the MOSFET. The shorter leg (negative side) of the LED, I wired that to the negative side of the battery.
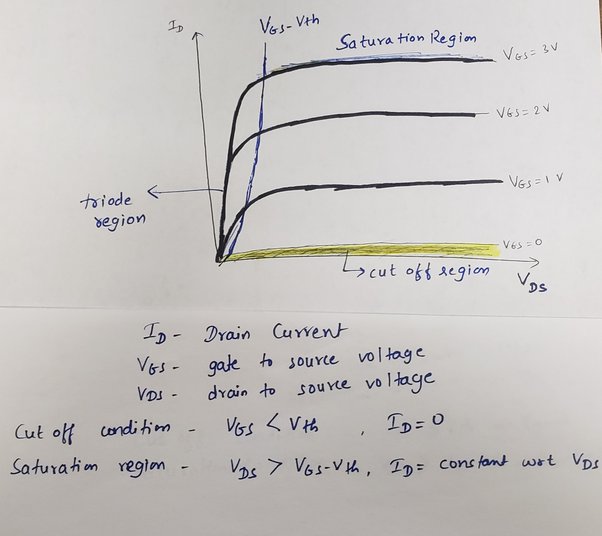
Making it Saturate
Now for the important part – getting the MOSFET into saturation. I connected a jumper wire from the positive side of the battery to the Gate pin of the MOSFET.
Boom! The LED lit up brightly. That’s because when I put enough voltage on the Gate, the MOSFET “turns on” fully, acting like a closed switch and letting current flow through from the Drain to the Source.
Playing Around
I disconnected the wire from the Gate, and the LED turned off. Connected it again, LED on. It’s like a little electronic switch! I spent a good few minutes just flipping the wire on and off, watching the LED blink.
What I Learned
It’s pretty simple to get a MOSFET working in saturation. Basically, you just need to give it enough voltage at the Gate, and it lets current flow through the other two pins. Now to think about some cool projects I could use this in…